Manual installation
In this guide, we will show you how to manually install DSCM using HTML or JavaScript, allowing you to receive email alerts on website cloning attempts. This proactive approach can help you maintain control over your site’s content and security.
Step 1: Obtain Your DSCM Personal Link
Go to the official DSCM website at https://didsomeoneclone.me, input your website’s domain and your email address, and then patiently wait for a few seconds.
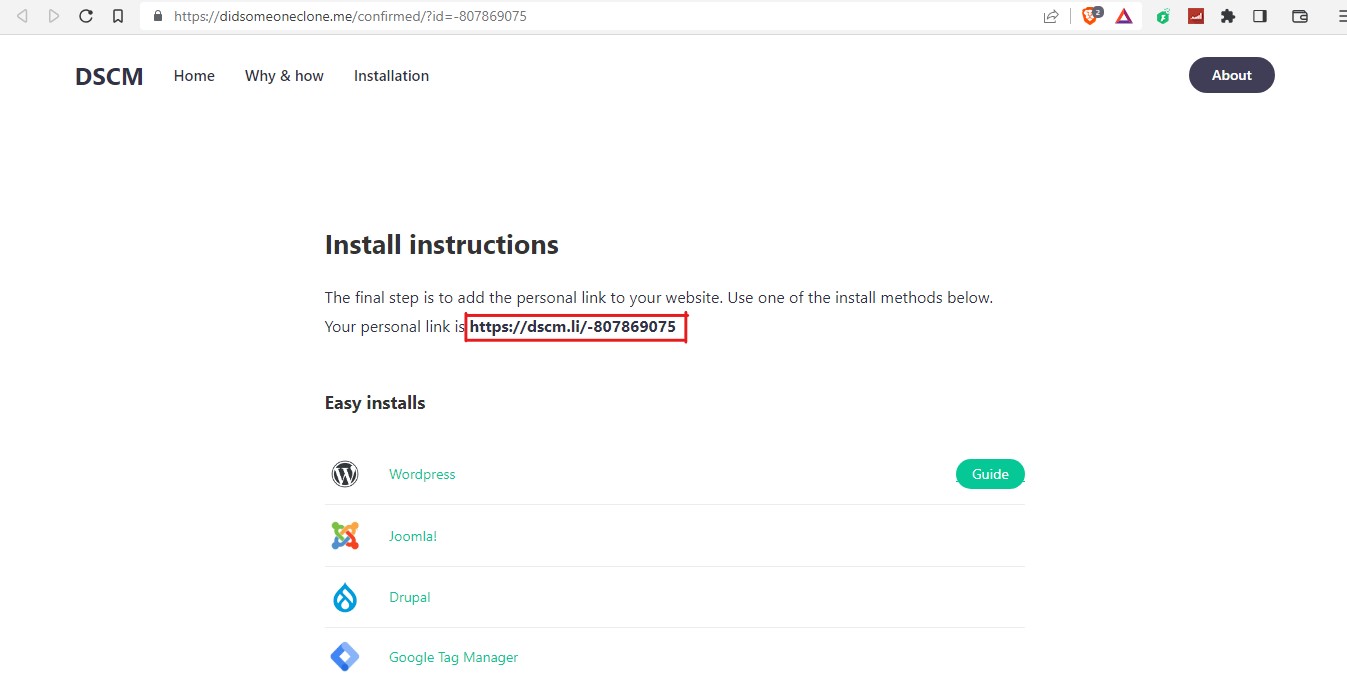
You will receive an email containing your personal link. Click the “Confirm email address” button in the email. On the destination page, your personal link is displayed:

Now that you have your personal link, you can proceed with the manual installation of DSCM.
Step 2: Manual installation steps
To manually install DSCM on your website, you will need to incorporate a HTML or JavaScript code snippet into your site’s source code.
1. Access your website’s source code
Begin by accessing your website’s source code. You can usually do this through your website’s content management system (CMS) or by directly editing the HTML files if you have access to them.
2. Insert code snippet
Insert the following code snippet between the HTML <head> tags within your website’s source code:
<script src="<YOUR_PERSONAL_LINK_HERE>" crossorigin="anonymous"></script>
Replace <YOUR_PERSONAL_LINK_HERE> with your personal link. This code will run in the background and remain hidden from visitors.
3. Save and update your website
After inserting the HTML or JavaScript code snippet, save your changes to the website’s source code. If you’re using a CMS, publish or update your website to apply the changes.
With DSCM now integrated into your website, you’re all set to monitor for cloning attempts. Anytime someone attempts to clone your website, you will receive email alerts notifying you of suspicious activity.