Microsoft 365 tenant installation
In this guide, we will walk you through the process of installing DSCM on your Microsoft 365 tenant. This allows you to get notified whenever a (AITM)-phishing attack is performed against your Microsoft 365 tenant.
A detection indicates that one of the users within your tenant attempted to login into the phishing website. This may indicate that access was obtained to his/her account, even bypassing MFA protections.
After a detection, you can take appropriate actions to protect your organization and employees. Such as resetting passwords, revoking user sessions, performing investigation, etc.
Step 1: Log in to your Microsoft Tenant
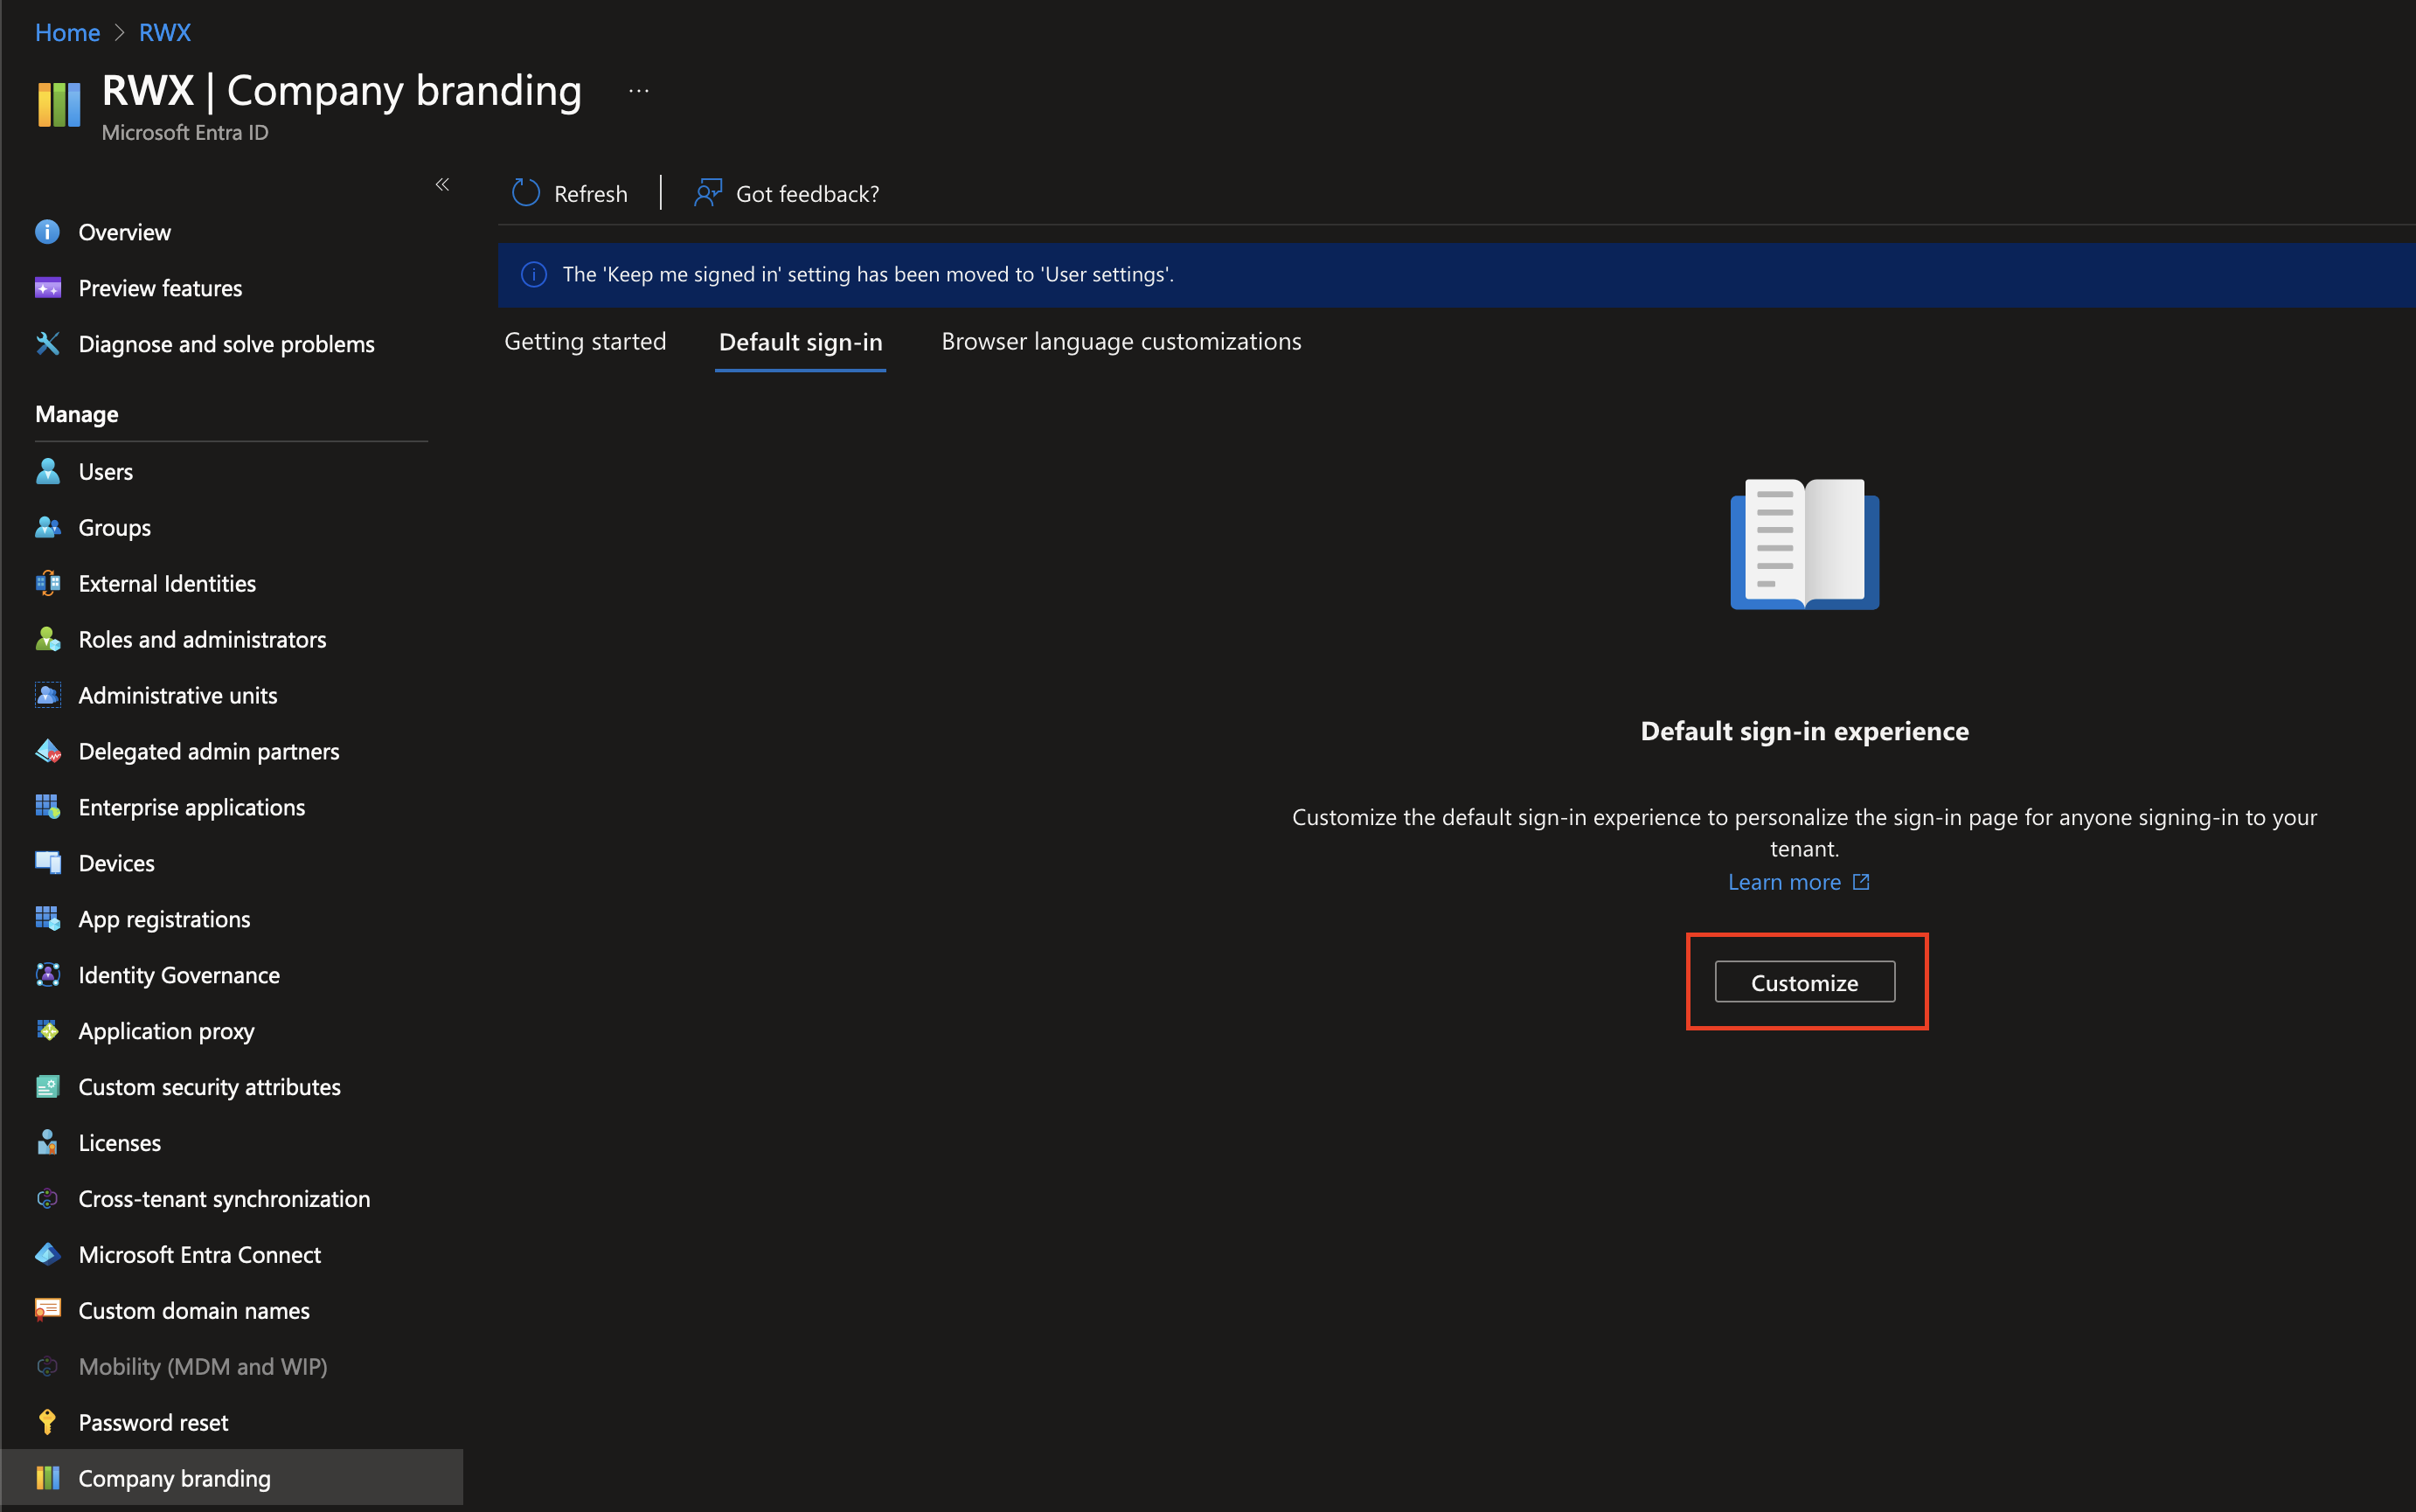
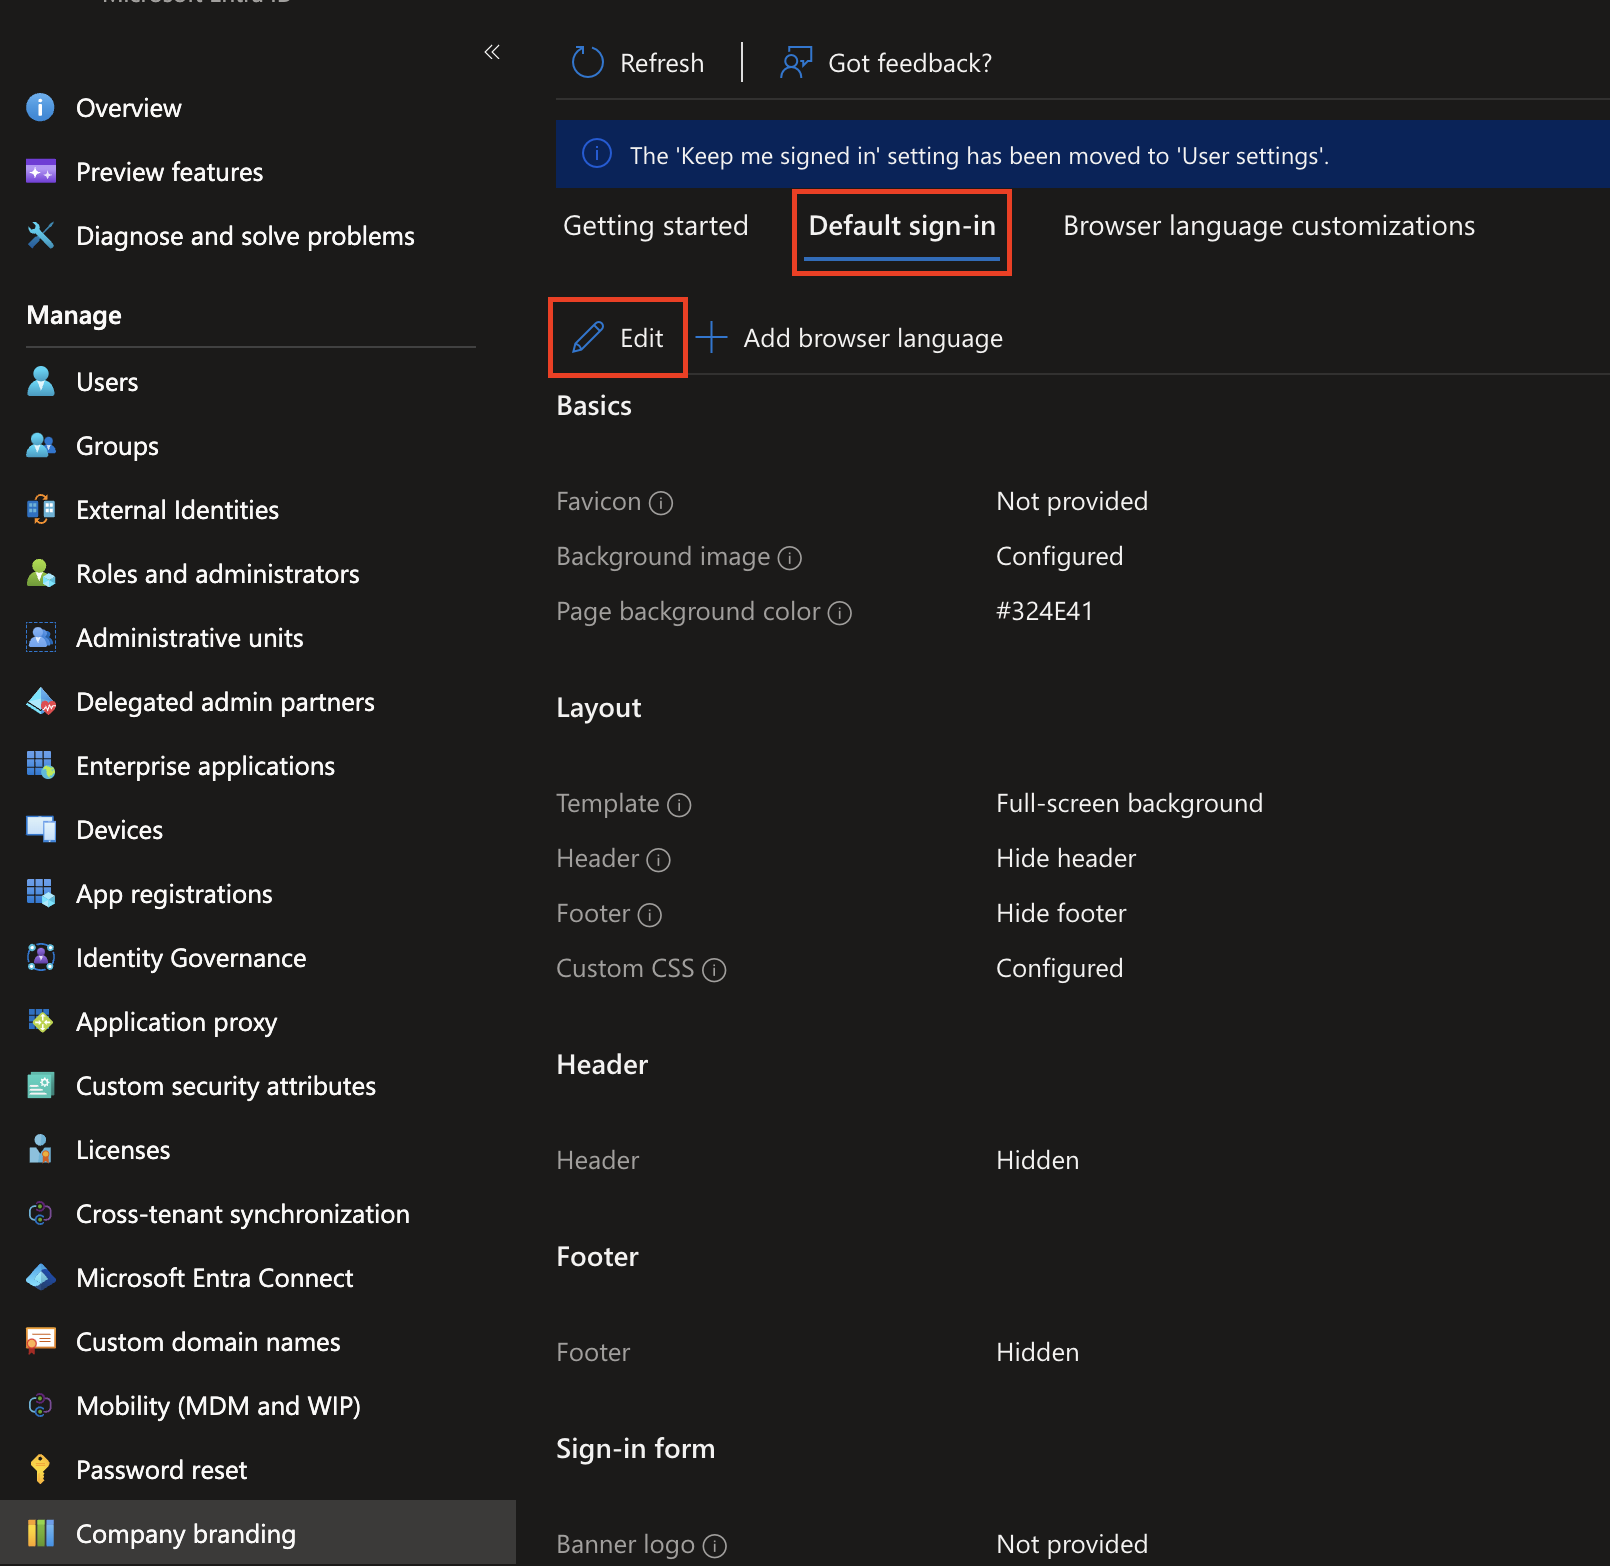
Open your preferred web browser and go to the Company Branding page in the Azure Portal. Login with your tenants administrator account to visit the page.
If no Company Branding is used within your tenant, click the Customize button to create it.

Otherwise, click the Edit button under the Default sign-in tab.

Step 2: Generate a personal link
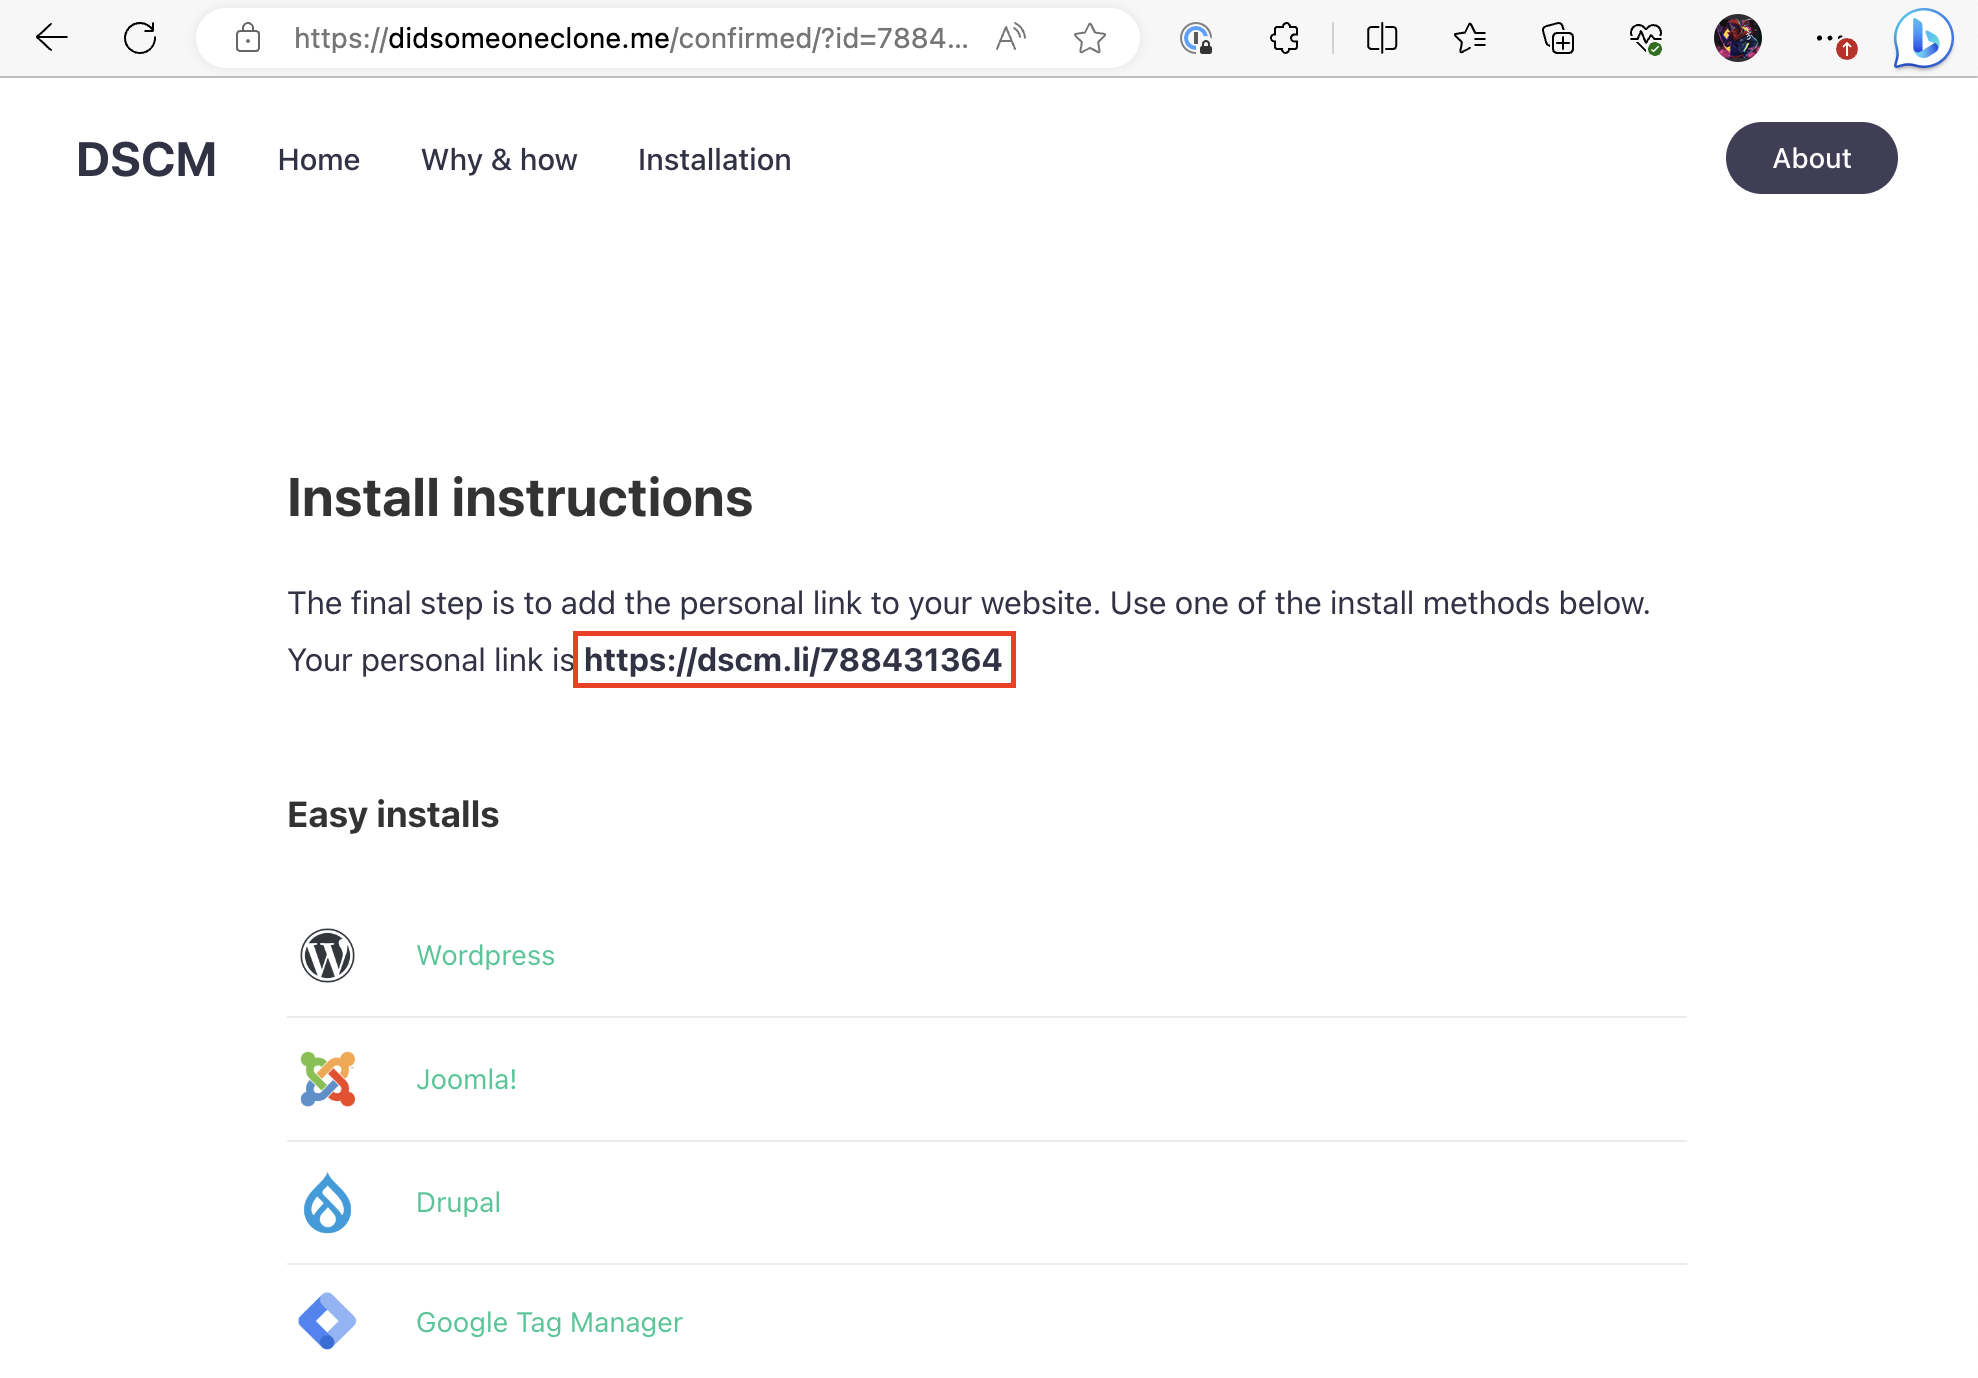
In another browser tab, visit the official DSCM website at https://didsomeoneclone.me. Enter the domain login.microsoftonline.com and your email in the sign-up form, and then wait a few seconds.
You will receive an email containing your personal link. Click the Install Instructions button in the email. On the destination page, your personal link is displayed:

Step 3: Create the CSS template file
Now it’s time to create a CSS file. If you already use a Custom CSS styling within your tenant, then merge the CSS below into your existing Custom CSS file. Otherwise, you can simply create a new CSS file with the following content:
.ext-sign-in-box {
  background: white url("<YOUR_PERSONAL_LINK>") center no-repeat;
}
Make sure to replace the <YOUR_PERSONAL_LINK> value with the link that you obtained in step 2.
Step 4: Upload the CSS file
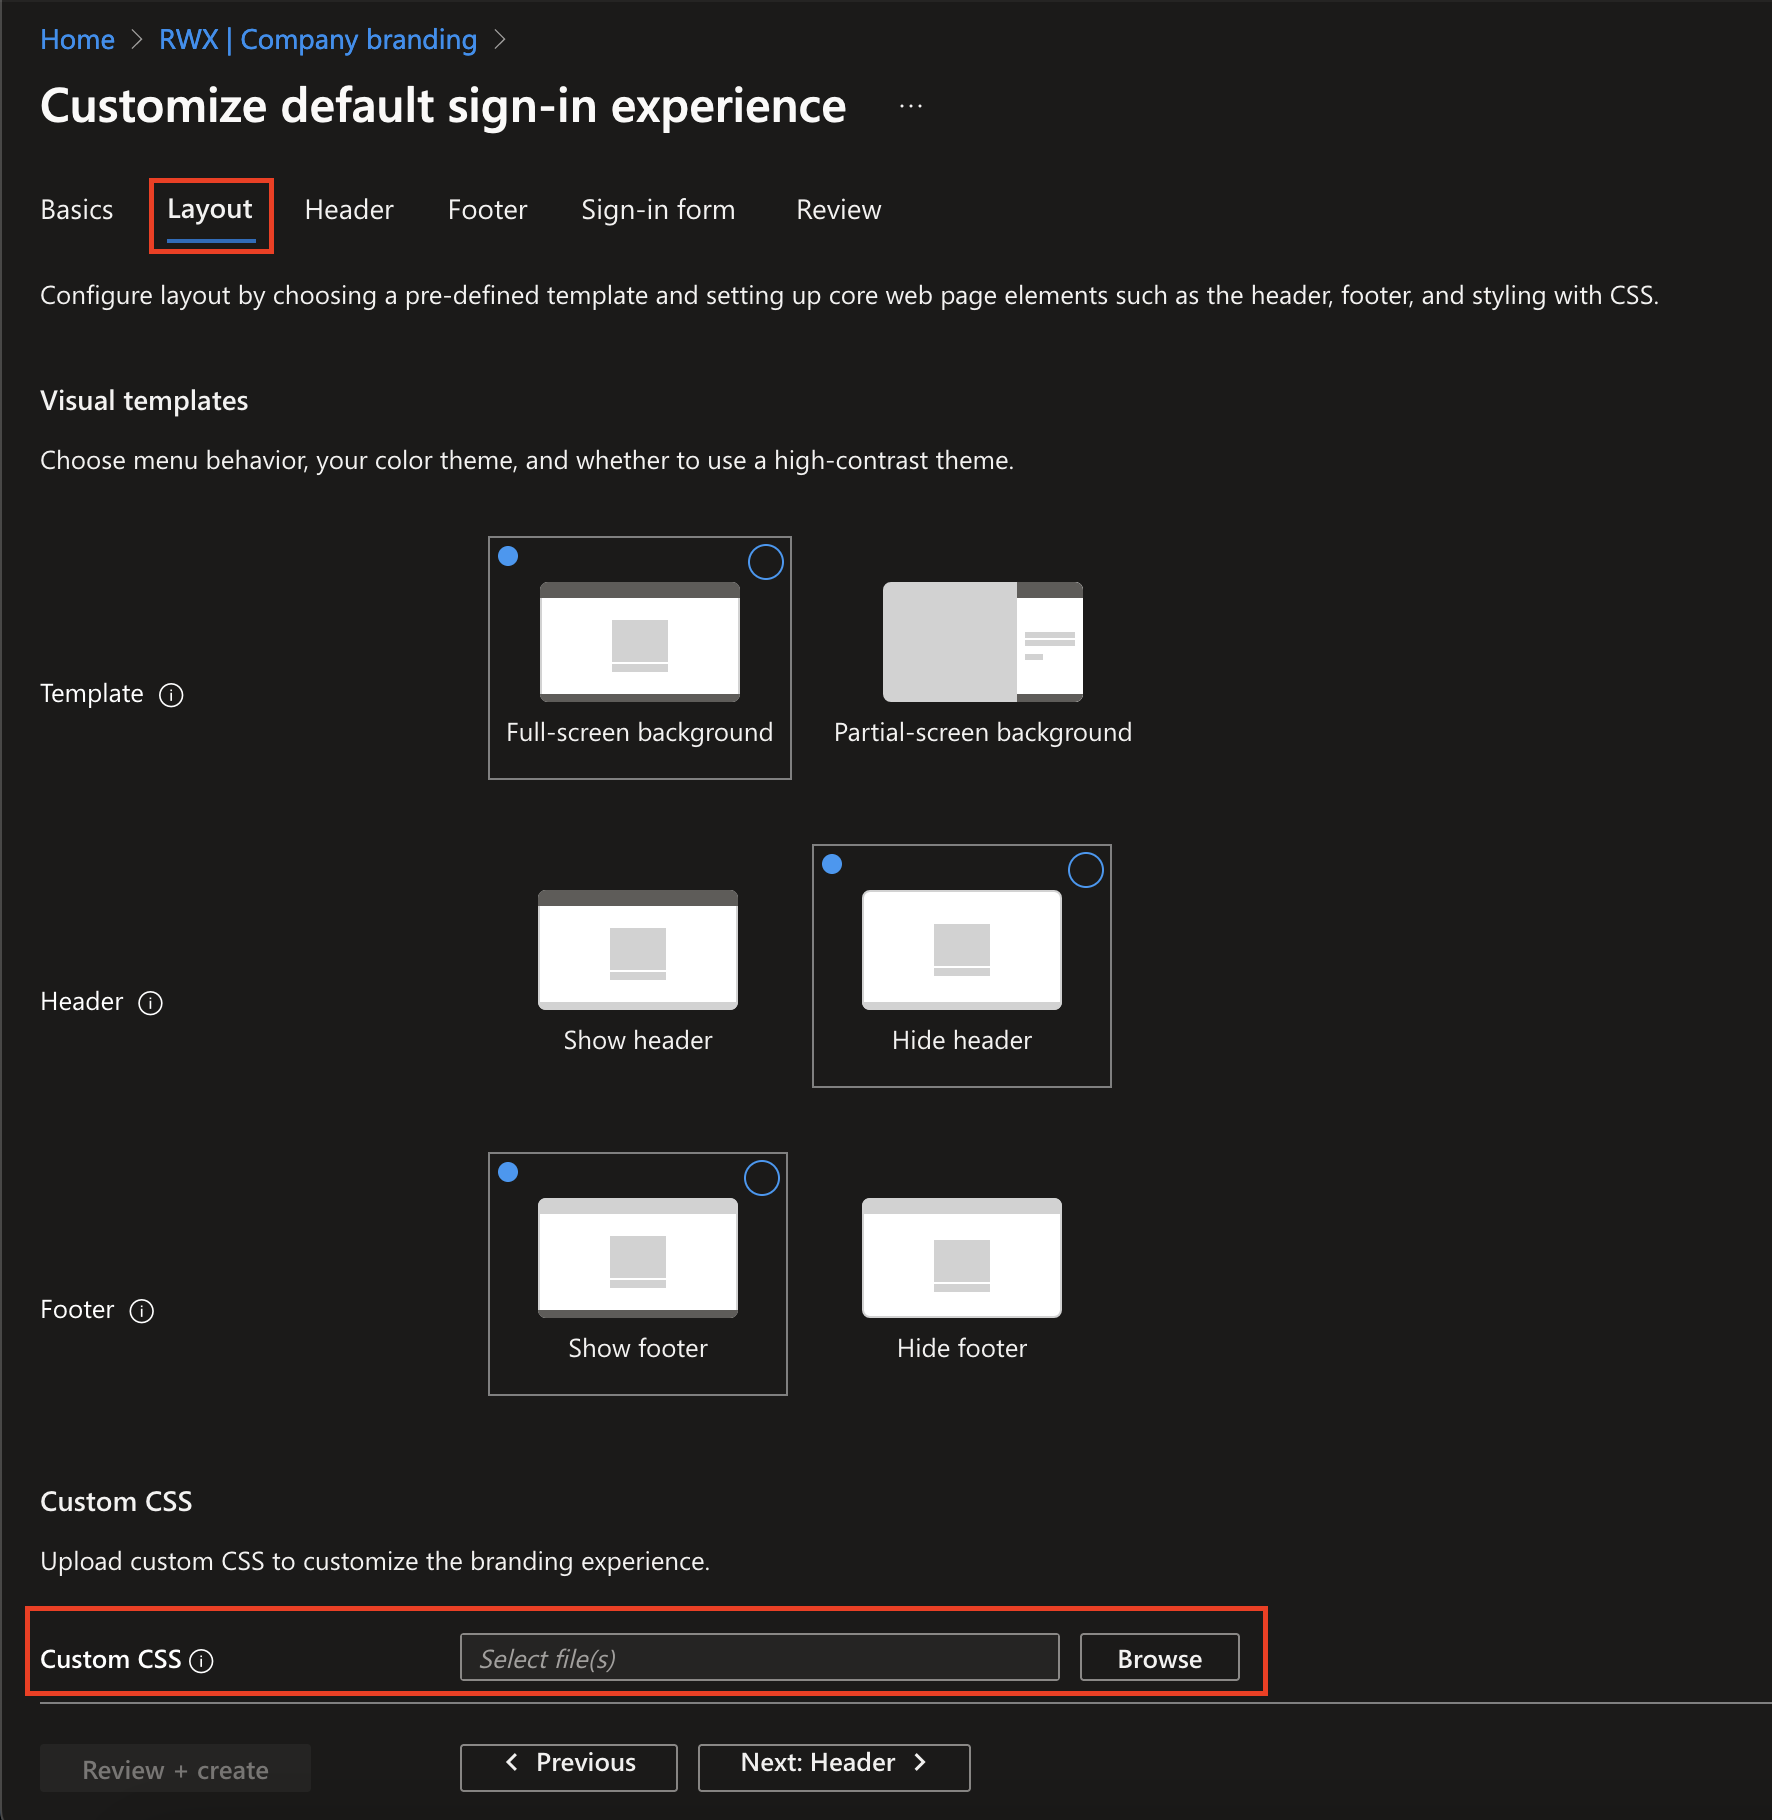
The last step is uploading the file into the Azure Portal. Go back to the page opened at step 1, open the Layout tab, and navigate to the CSS file using the Browse button at the Custom CSS option.

Click the Review + Save button to create the Company Branding.
Congratulations! You’ve successfully installed DSCM on your Microsoft 365 tenant. From now on, you’ll receive email notifications whenever someone uses your Microsoft login page in a phishing attack.
Looking for more in-depth technical details? Check this write-up.