Wordpress installation
In this guide, we will walk you through the process of installing DSCM via a WordPress Plugin to enhance the security of your WordPress website.
Step 1: Log in to Your WordPress Dashboard
Open your preferred web browser and go to the login page of your WordPress website. Enter your username and password to access your WordPress admin dashboard.

Step 2: Access the Plugin Section
Once you’re logged in, you’ll find the WordPress admin dashboard. Look for the “Plugins” option on the left-hand sidebar and click on it.

Step 3: Search for “Did someone clone me”
In the “Plugins” section, you’ll see several options. Click on “Add New.” This will take you to the plugin installation page where you will find a search bar at the top right of the page. Next, type “Did someone clone me” and press “Enter” to search for the plugin
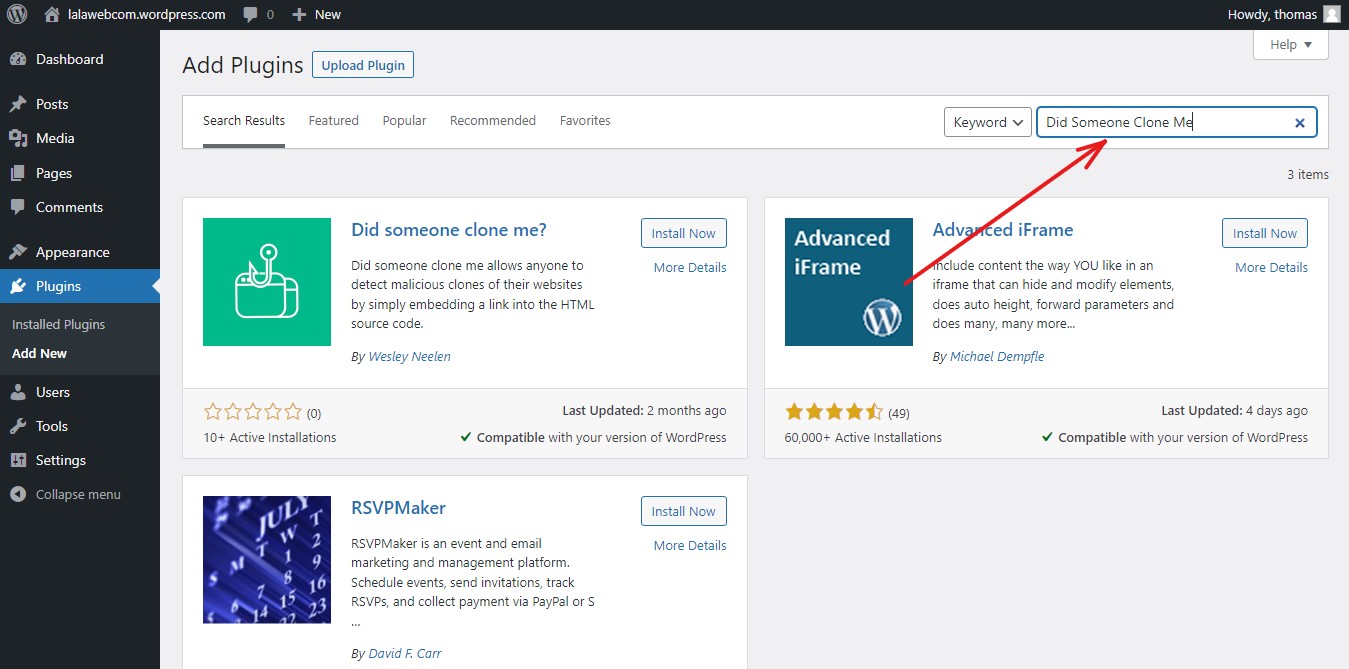
Step 4: Locate and Install the DSCM Plugin
Browse the search results until you find the DSCM plugin. Click on the “Install Now” button located next to the plugin’s name.
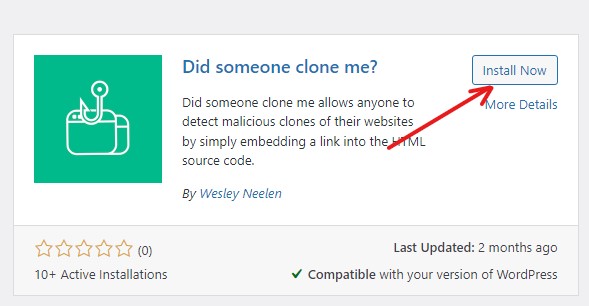
Step 5: Activate the Plugin
After the installation is complete, a new button labeled “Activate” will appear. Click on it to activate the DSCM plugin.
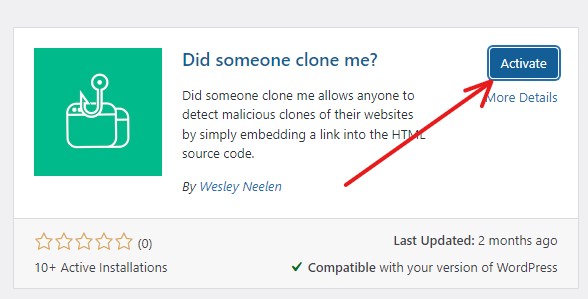
Step 6: Configure DSCM
Now that you’ve installed and activated the DSCM plugin on your website, it’s time to configure it for receiving notifications when someone clones your site. Visit the official DSCM website at https://didsomeoneclone.me, enter your WordPress website domain and your email, and then wait a few seconds.
You will receive an email containing your personal link. Click the “Confirm email address” button in the email. On the destination page, your personal link is displayed:
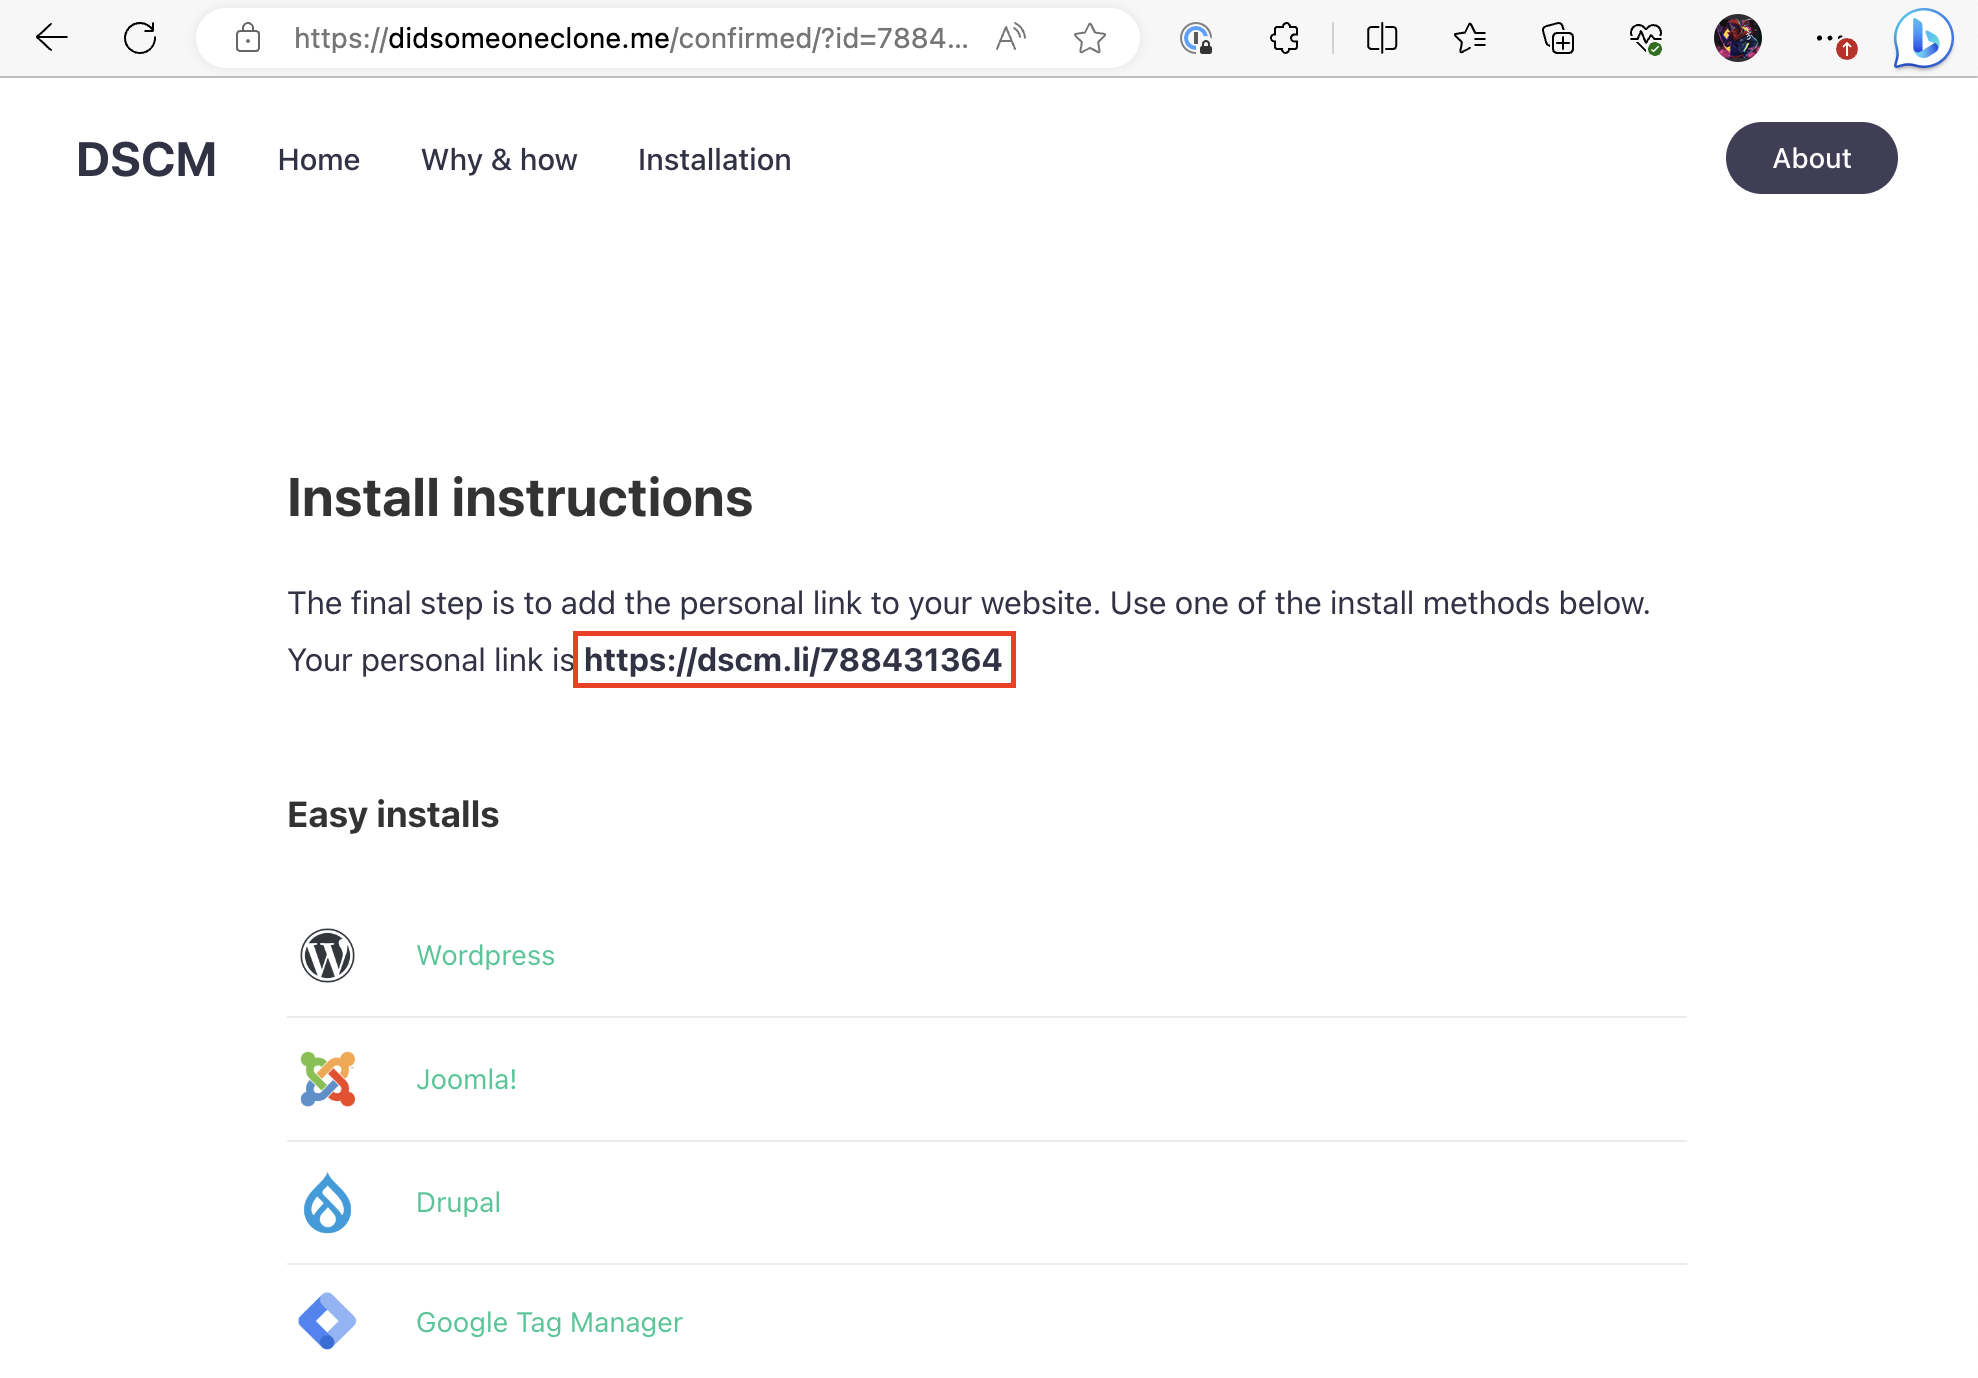
Step 7: Configure the plugins Settings
After receiving the confirmation notification with your personal link, copy it. Then, go to your WordPress Dashboard and find the plugin settings in the menu on the sidebar.
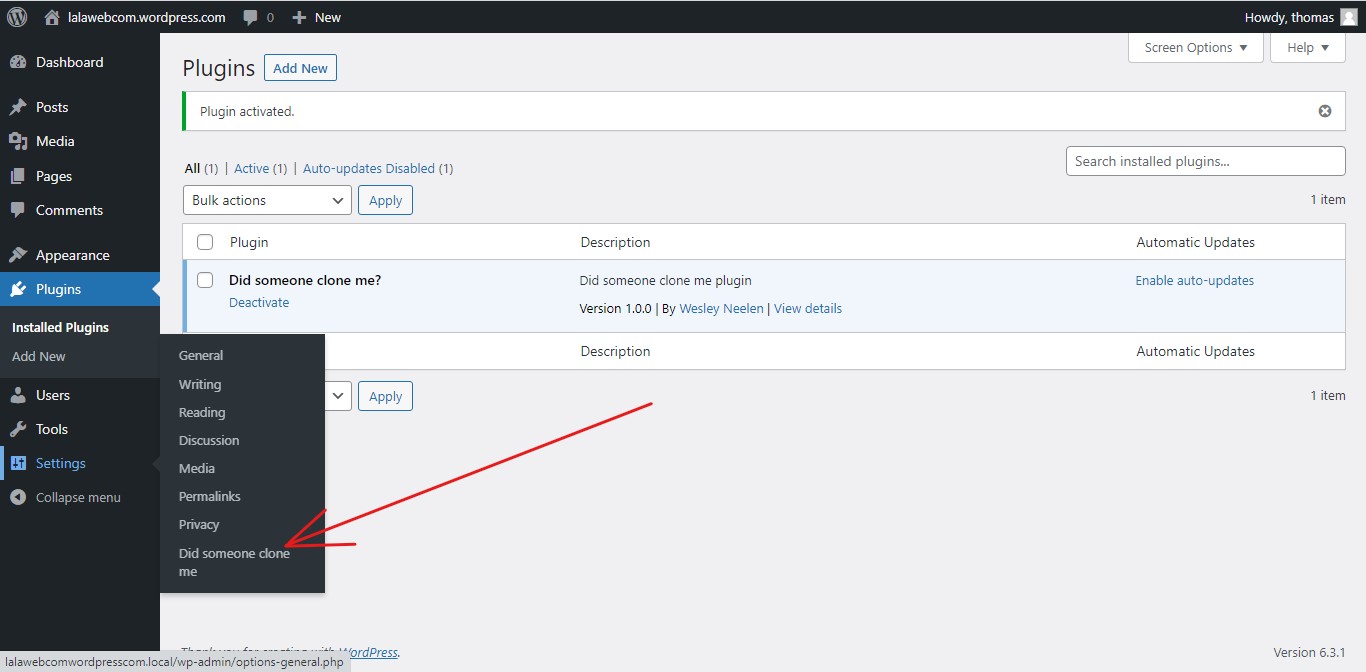
Click on the plugin, and you’ll be redirected to a dedicated page for it. Within the plugin settings, look for a specific section where you can add and configure links.
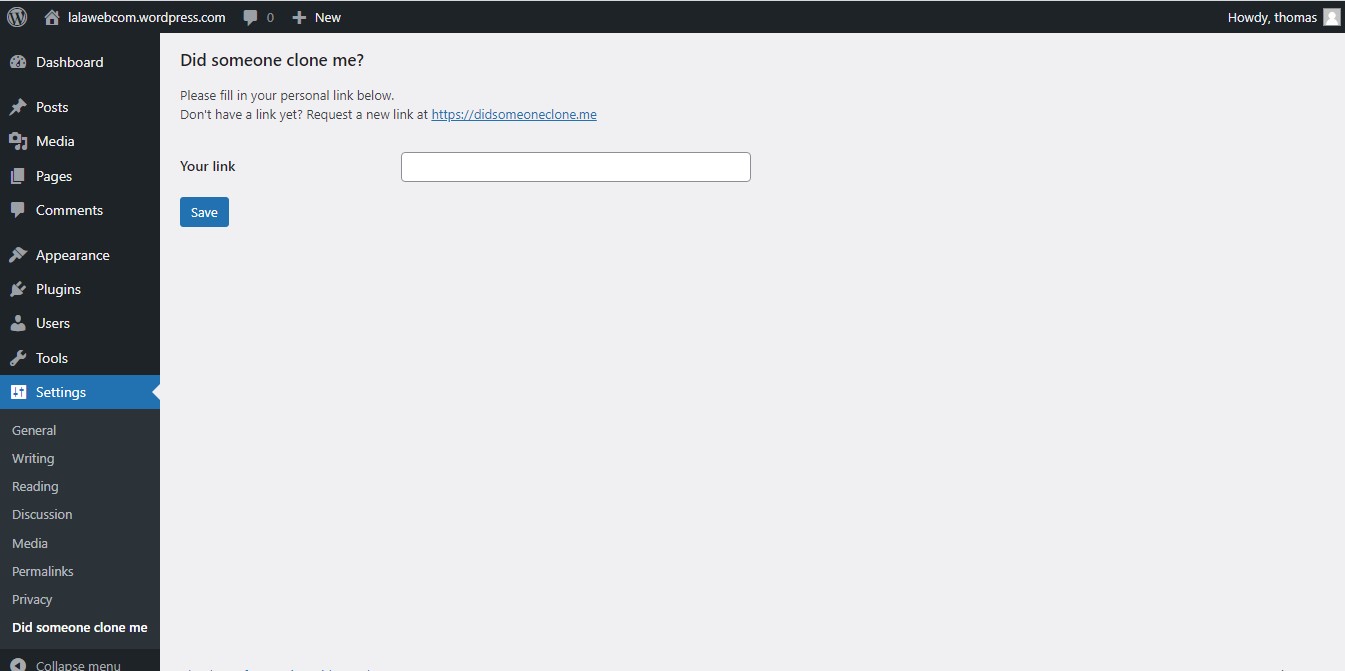
Once you’ve configured the link, simply click the ‘Save’ button. This action will embed the link into your content.
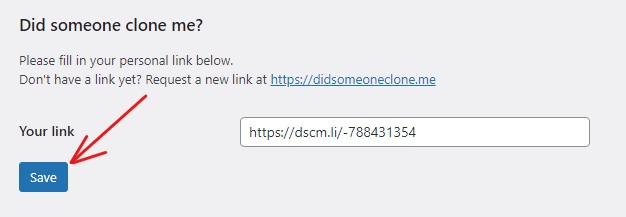
Congratulations! You’ve successfully installed DSCM via a WordPress Plugin. From now on, you’ll receive email notifications whenever someone clones your website.